Showing posts with label babywearing. Show all posts

Thursday, May 24, 2012

birds of a feather...nestled

from sew sweetness blog
Have you seen this pieced feather? Well, it was made by Anna Maria Horner... I love it.

So, when I was trying to decide what to put on the front panel of the wrap I was making for my cousin's first baby (who was born friday night and I have been helping with the past few days... Oh- delightful!) what do you think came to mind? You must know me well ;-) Of course I had to copy Anna Maria! 


Here is tiny baby in her feathered pouch... if you are interested in a step by step of how I made the feather follow right along(I have no doubt that Anna Maria had it refined a bit more- you are getting my first copy cat attempt).


I paper pieced the colorful sides, so here is my paper. (The shape should be narrower at one end- I forgot and fixed that later).


I sewed strips of fabric together on top of the paper at an angle and ironed each strip open as I went along. When paper piecing set the stitch length tight; this will help the paper be very perforated and easy to tear away.


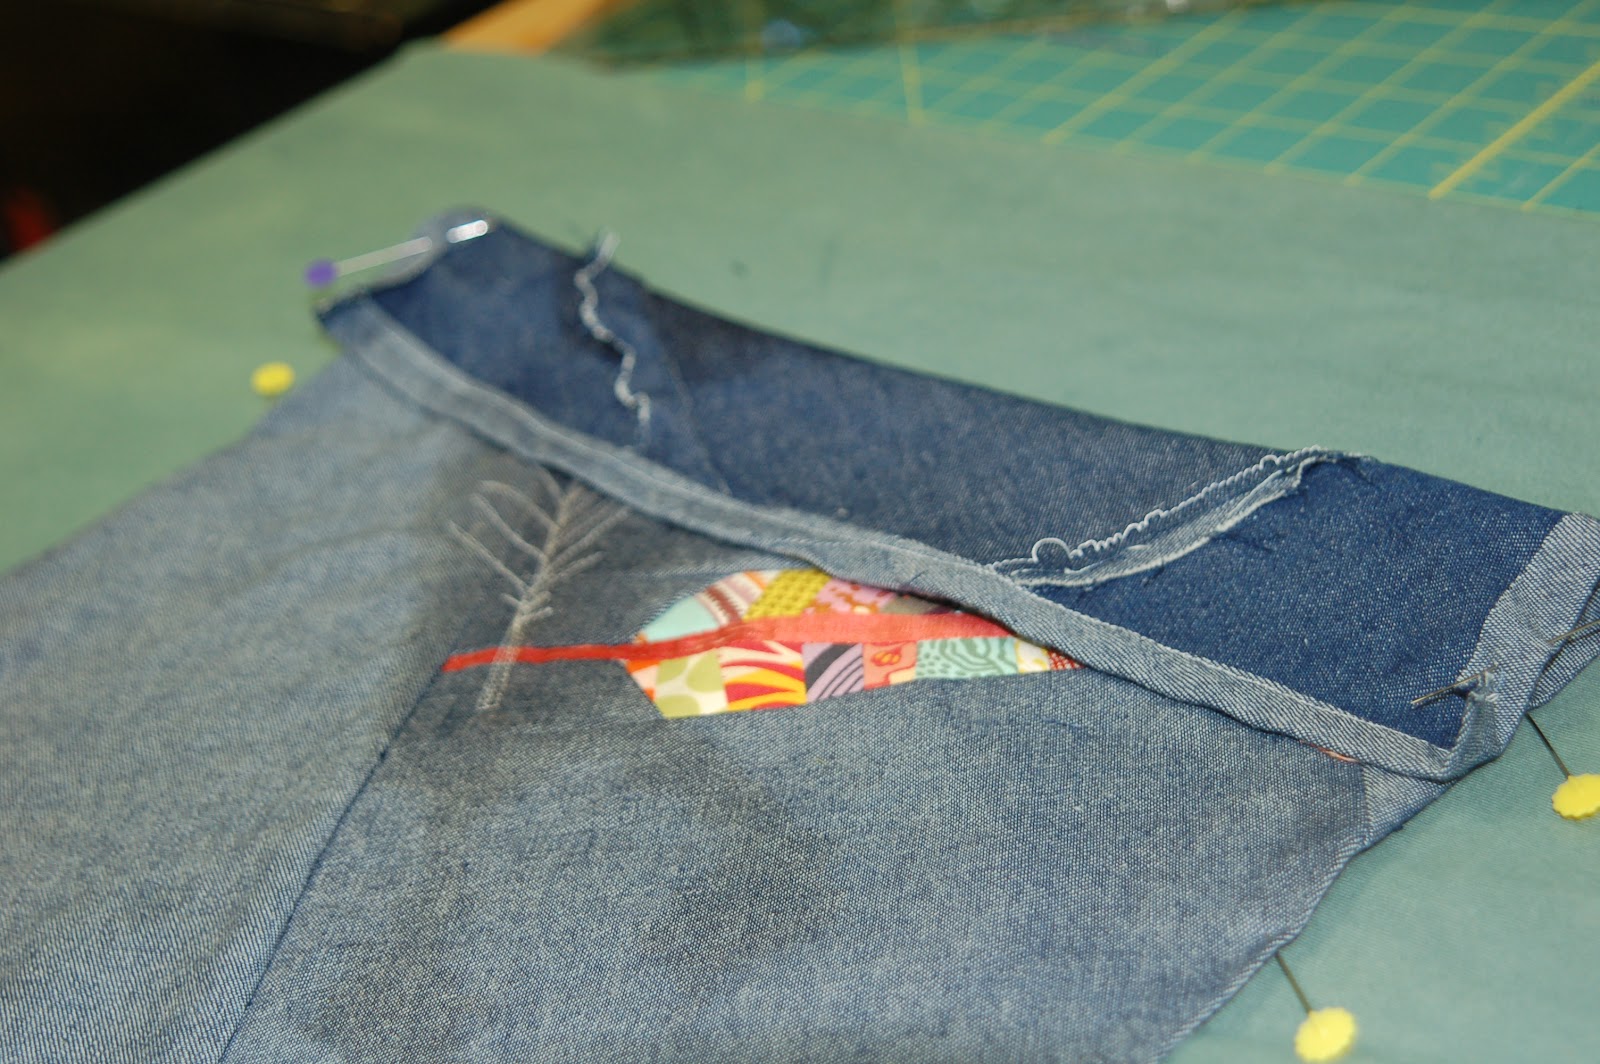
When this step is finished, the back should look about like this.


Then you trim off the excess fabric to get it into the shape of the template/base paper.


Now tear the paper off of the back.


One down, one to go....


When colored pieces are finished, you sew them to a piece of background fabric that looks about this shape.


Match up the edges the way you would pieces of bias stripes.


Next, sew your center strip to both side pieces.


Add little triangles to close in the top...


Then, add background fabric to the sides... Ta Da -- feather complete. Now, what to do with it?


I sewed more background fabric until I had a square that measured about 16"X16". I sewed a free form feather to finish the design. Then, I hemmed the top edge under.


I ironed all my edges under and pinned the two sides and the bottom to the center of my jersey. (to make a moby type wrap you use a ~20" X 5.5 yard piece (give or take depending on size of intended wearer) of jersey fabric. I like a medium weight that is mostly cotton with a little bit of lycra).

Sew the three sides down using a coordinating thread. (The white feather looks splotchy because I had just sprayed it to erase my marker sketch.)


See the handy pocket for keys and dipes? The panel is also nice for marking the center when putting on the wrap.


Peep eye ;-)


Thursday, April 12, 2012

proud as a peacock...

...That is what my whole family will be next month when my cousin had her first baby. That isn't really why I put a peacock on her baby sling -- I just thought it would be so lovely... and that is certainly a good enough reason to do something, in my book;-)
 If you saw the flowers and wreath I made for her baby shower you will realize that I was pretty settled on a certain color scheme... coral, pink, orange, and turquoise are getting a lot of play these days.

 I love love love a linen ring sling! I am going to be sure this new mama knows the trick to wearing this comfortably so that she and that new baby girl will be fond of their ring sling days together ;-)


A little touch of hand sewing makes a project feel so exquisite don't you think?

Making a ring sling is not very complicated- there are tons of tutorials online and you can get the rings from slingrings.com. Here is a little glimpse behind the scenes of the applique process for the peacock:

inspiration

lots of feathers!
If you have missed some of my previous tutorials and want to more details on my applique process go here for a blossom and here for a cityscape.

Saturday, July 25, 2009

it's a wrap


we have now spent a good part of the summer just like this-- me knitting, anna enjoying her ride/nap in this wonderful baby carrier. you can buy a stretchy wrap like this one @ www.mobywrap.com or you can do what i did and make one. i promise this is as easy as it gets! you jst buy jersey fabric (~60 in wide bolt) that is ~97% cotton w/ a bit of lycra in it. you will need 5.5 yards, but you will get three wraps out of it. you simply cut down the lenght of the bolt to divide it into thirds-- see, you don't even need a sewing machine. now if you want to add a bit of pretty to it- then, you cut a ~ 14in square of fabric to add to the front middle. you can find instructions for use on the moby website- and probably youtube as well. it may seem tricky, but i promise after a couple of times it will be a breeze!

Thursday, July 9, 2009

around here

anna has made it through her second "wonder week" (i'm telling you- get the book!) she was needing to be held constantly-- i had my moby wrap(that i made) on for 8 hours last week and she was in it almost the whole entire time! but now she is taking a two- three hour afternoon nap-- in her crib and just hanging out in her bouncy seat alone for long periods of time... well, not totally alone- she has made a new friend. notice the lion that now hangs out w/ her. they have become fast friends... she makes faces and coos to him. i kind of feel sorry for her though b/c i don't think she realizes that he isn't loving her back ;-) it is so cute to see her meeting this little guy that elisha enjoyed looking at and talking to when he was her age.... and it has also been cute to see elisha come and make the little lion roar at her. there are some hazards associated with having a two year old brother, but i think the fun out weighs them for her. this is anna in he first back carry. i'm wearing her in a "gypsy mama" cotton gauze wrap that i got at the consignment sale for $20. andrew helped me get her there. i had things to do without her in front of me and she had no desire to be left alone, so this was the compromise... and she quickly fell asleep.


Tuesday, January 6, 2009

new sling

here is a lovely sling i just finished... i'm not usually drawn to purple, but i just love this silk fabric. it is purple woven with a goldish color and i put silver silk and a black and natural patterned cotton applique on it... i think it is just lovely... and i hope that bailey will think so too!


Friday, May 2, 2008

sling use instructions -- kangaroo carry

the kangaroo carry is a great way to carry your baby facing outward. this carry can be used with babies who have good head control. it can also be done with a pouch sling.begin by adjusting the fabric through the rings to create a pouch with a wall of fabric against your body.


hold your baby up against your body with their back to you. cross the baby's feet.
hold their feet and body with one hand as you open the pouch of the sling with the other hand. settle the baby's bottom down into the sling.
gather the excess fabric around to the rings. tighten by lifting the fabric of the tail up and pull out. then pull the fabric down to lock it into the rings.
there you are. these special moments sure beat using a stroller!


sling use instructions - hip carry

these are instructions for a hip carry. you should wait until your baby has good head control and can sit up before using this carry. the 'tummy to tummy' carry is similar and can be used for babies with head control that can't sit up yet... both carry styles will be great for duration of the time you use your sling (until ~35 lbs).

start this carry (and all others as well) by making a pocket with your sling. pull the inner rail (edge) tight to form a wall of fabric against your body... but not too tight b/c for this carry you will be putting your baby's feet between the sling and your body. you tighten it more once your baby is in the sling.
lift you baby up on your shoulder opposite the rings in a high burp position. then, put your hand up between the sling and your body and grab you baby's feet to pull them through.
continue supporting your child's weight as you spread the fabric under their bottom and up their back.
then lean forward a little as you settle him into a sitting position in the sling. be sure to have your child's bottom below his knees... this insures he is sitting in the sling and will not slip out. tighten if you need to, to be sure their weight is above your belly button... this will be more comfortable as it distributes the weight. note how the rings have moved down my shoulder toward my baby. to adjust the rings back up to a corsage position simply lift your baby's weight from inside the sling fabric as you slide the sling around to get the rings away from you baby with you other hand.
be sure to tighten the sling so that your baby is snug against you. pull excess fabric around toward the rings and lift the top rail (edge) of fabric on the tail up and out and then down to lock the fabric in the rings.
there you are! sure beats holding that baby up with just your arm and hip!
to get the baby out of the sling -- lift up their weight with one hand as you separate the rings to loosen the fabric. it is a good idea to only loosen it enough to pull your baby up and out... that way it will be close to the right tightness for next time you put your baby in the same way.

Thursday, May 1, 2008

sling use instructions-- putting the sling on

before you put your ring sling on each time, make sure the fabric is not twisted through the rings. spread the fabric through the rings and be sure to have the edges 'rails' on either side to ease adjustments.
the ring sling can be worn on either side. be sure to have the rings in front and slip your arm through the sling.
pull the sling over your head to your opposite shoulder.
position the rings so that they are just in front of your shoulder - about where you would pin a corsage. you should start with them higher than i have pictured here, because as you put your baby in the sling the rings tend to slide down.
be sure to spread the fabric out and have it cupping your shoulder. this will evenly distribute the weight so that there are no pressure points.

be sure the fabric is spread out over your back and not twisted.
another tip for wearing comfort is to be sure your baby's weight is above your belly button.

sling use instructions-- back carry

these are directions for a back carry in a ring sling... a similar carry can be done in a pouch sling as well. this carry is for toddlers.
start from a hip carry (see 'hip carry' instructions). have the rings higher on your shoulder than normal.
lift your child's weight with the arm opposite the rings. use the other hand to pull the rings around as you shift the child to your back.
leaning forward to adjust can be helpful...
now tighten the rings and if you choose you can wrap the tail around the rings in a sort of a knot... now you are hands free!
(whenever you are doing a new carry have a spotter on hand to help assist you. a mirror can also be very helpful to get things just right)

Monday, October 29, 2007

After the first show...(well perhaps it's the 2nd)

i am home dealing with the aftermath of my first show for plain jane stuff. i was in montegomery at the 'holiday market'. it went better than i expected! ...much better than my first craft show experience years ago with my highschool friend - we were 'ladybugs' ... we had very cute stuff-- too cute for the show we were a part of. this time jess and i teamed up again, and while our stuff was very cute the odds were against us! our booth was at the very back of the coloseum in the concourse... very hard to find-- except for our big bright pink christmas trees! i'll have to post pics soon.
i sold quite a few slings and i am so thrilled! i saw so many mamas walking by with tired arms carrying their babies around... or pushing a fussing baby in a stroller. it makes me so satisfied to know that at least ten mamas now have a wonderful way to carry their babies without straining and exhausting themselves. and these lucky babies get to have a special time looking at mama and seeing the world from her vantage point( & best of all-- flirting with strangers @ eye level... @ least my little man is a big flirt!)... instead of staring at peoples knees. there are some mamas who bought a sling to carry around their youngest of many children. it makes my heart warm to think how the whole family will benefit from having a happy baby and a mama w/ free hands!
on my first day home i have been swamped with laundry & grocery shopping... but i found time to begin my next creative quest-- baby clothes. little e now has a super super cute new outfit! pic to follow as soon as i finish unpacking the car (i have my priorities straight don't i?) and get the camera out.